 |
||||||||
All content is
© Lady Bay Art Glass. Reproduction in whole or part is not permitted.
Whilst we understand that it is possible to copy anything on this site we ask that you only do so for your own immediate viewing and that if you want to use parts of this site for other purposes you should ask our permission first.
Introduction
All the processes involved in making a leaded light are entirely traditional from the cutting of glass, leading of the glass pieces, to the soldering, cementing and polishing.
Modern technology provides us with the ability to draw up a plan, printed from software on a 24" wide roll, with an accuracy that was never possible by hand drawing. The tools we use are a further refined version of those in use 50 or 100 years ago and, with the exception of the diamond headed grinder, would be recognisable to any glass artisan of that era.
The materials have also changed very little. Glass is still bought in sheets, nowadays approx. 800mm x 700mm, smaller for mouthblown glass, and cut into the required sized pieces. Lead is available in broadly similar sizes and shapes, though nowadays it is alloyed with other metals to improve strength and resistance to tarnishing. Solder is still an alloy of tin and lead though nowadays we use a premium variety (grade K blowpipe) with 60%tin/40%lead.
The Plan
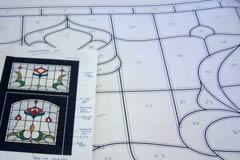
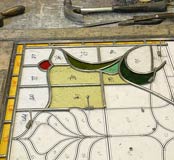
Proposal drawings start out as full size and then scaled down to fit on an A4 page. For the working plan, we take the full size drawing and modify it so that it is monochrome only and the line widths represent the width of the lead core (the heart size of the lead). We also place two other offset lines to represent the overall width of the lead. This acts both as a guide for the cutting of the lead and alignment when soldering. The printout of the working drawing is then used as a pattern for cutting out the glass pieces and assembling the panel on. Glass selection has already been made by the customer and notes were made on our copy of the proposal drawing so that we know which glass colour goes where.
 |
 |
The plan ready for cutting glass. |
The glass and lead cut lines |
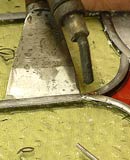
Glass Cutting
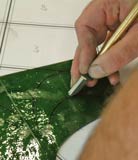
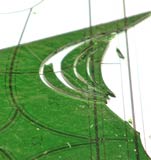
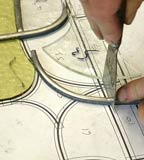
Using a tungsten carbide wheel glass cutter each piece is cut by hand and checked for fit on the plan. If the piece needs trimming this will be done with grozing pliers or the diamond grinder. When cutting glass pieces with tight inside curves these have to be scored a number of times taking out progressively more glass with each cut. Only when the difficult curve has been successfully cut will the rest of the piece will be cut out. Not all glass types are the same with regard to ease of cutting difficult curves. In general mouthblown glass is the most reliable, but some machine rolled glass can also be very easy to cut. Broadly speaking the thicker the glass the more care is needed. As the glass is cut each piece is numbered .
 |
 |
 |
Cutting an inside curve. |
Progressively deeper cuts. |
Cutting finished. Pieces all labeled. |
Leading
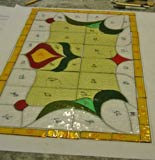
With the plan on the bench or a stout board two straight strips of wood are nailed to it to form the top and right edges. This is personal preference, some glaziers will use bottom and left edges or some other combination. The border lead is laid against the edges and glass pieces are placed into it. Between the glass pieces another piece of lead is inserted, bent to the shape of the edge. It is cut with a lead knife to butt up closely to the lead to which it is joined. This continues until all pieces are laid and the remaining border leads are fitted.
 |
 |
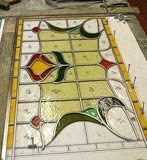 |
Leading up against two edge boards. |
Cutting the lead with a lead knife. |
Only 7 pieces to go. |
Soldering
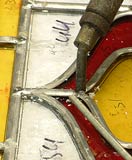
To each joint tallow is applied as a flux. We use an electric soldering iron (though we have gas irons of the sort used for many years, electric irons are more convenient) and melt Grade K solder onto the joint allowing it to flow into the lead joint to make a strong joint. When all joints have been completed the excess tallow is brushed off and the panel turned over to solder the other side.
 |
 |
Soldering a joint. The white bits are tallow which act as a flux. |
Using the lead knife to hold the lead in position whilst applying solder. |
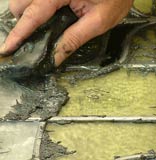
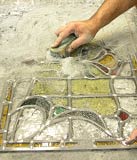
Cementing
The panel is laid face up on the bench and the special cement compound is forcefully brushed into the lead repeatedly until it is forced though to the other side. The panel is turned over and the process repeated so that each and every joint is well filled with cement. Whiting is then sprinkled over the panel to absorb the excess cement. This is brushed off taking care to remove all the excess from the lead. Any excess on the glass is left at this stage. The panel is turned over, the process repeated and then coated with fresh whiting and left for approx. 24 hours to dry. All the excess cement adjacent to the lead is scraped with a blade to trim it back flush. The panel is then brushed and vacuumed to remove all whiting and loose cement, and left for a further 3-4 days to dry.
 |
 |
 |
Cement being worked into the lead. A very messy job! |
Cleaning the excess cement using powdered chalk. |
After inital drying, the excess cement is removed with a blade. |
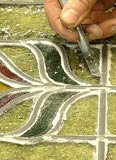
Polishing
When the cement is fully dry, Zebo black grate polish is applied to the lead and then buffed to a bright gunmetal patina. A dusting brush will be used to remove any dust sticking to the panel. If reinforcing bars are to be fitted these will soldered to the panel prior to polishing the back of the panel.
 |
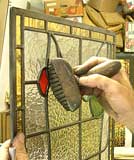 |
Panel being buffed to a shiny gunmetal finish. |
An old dusting brish is very good for cleaing the corners. |
Fitting
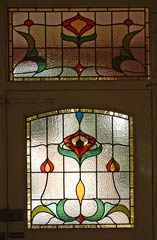 |
The finished job. |
Panels fittted into a door will usually require the existing glass to be removed. We will then remove all the old putty, scrape clean the rebate and sand down any rough paintwork before priming the rebate and any exposed wood. The new panels will be bedded in traditional linseed oil putty and secured with beading. Where the existing beading not original we can supply and fit beading of a size and shape suitable for an old door. We have stocks of small and medium staff beading, a type commonly used in Victorian doors, other types can usually be made to order. The beading will be nailed in place and the heads countersunk and the holes filled. Panels fitted to windows usually go in from the outside and these will be finished with a putty bead. Wooden beading on the outside is not a good idea for any type of glazing since water will eventually seep behind the beading and rot the frame. Of course the panels will be cleaned of any putty smears before leaving the site, (we also do a good job of cleaning the floor aswell).